
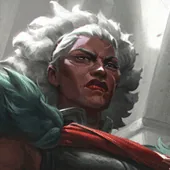
Ambessa Jungle Wild Rift overview and best build snapshot
Best Build
Quick snapshot of the default setup for this guide.
Boots
Items
Summoner Spells

Spell 1
Flash

Spell 2
Smite
How to play
Keep attacking as you clear After each ability, use the stronger basic attack it gives you to restore energy before casting again.
Gank enemies far from safety Move as you cast abilities to dash and stay close to your target. Use your 2nd ability to shield yourself when they fight back.
Use your ultimate to reach key targets Look for an enemy damage dealer your team can help you finish.
Guide author
Royal
Royal has reached Rank 1 in EU and NA, and Legend and Sovereign on the Chinese server. Created by Royal with input from high elo and professional players and the WildRiftGuides Discord community.
Rank 1 on this champion? Help improve this guide and receive credit. Contact us on Discord.
Strengths
- Her dashes chain out of every ability, making ganks, duels, and escapes one motion that is hard to space against.
- Her long-range suppression pins the fight's most important target, turning contested objectives and skirmishes into free ones.
- She snowballs extremely well, converting an early lead into repeated picks and clean backline access.
Weaknesses
- A spent combo leaves her stuck in the open with no second exit, and hard crowd control punishes that hard.
- Her ganks before the ultimate are weak, and her clear loses the race against fast early junglers.
- She is squishier than the bruisers she fights, so ranged poke and burst chip her down before she can dash in.
Ambessa Jungle Wild Rift best build, items, runes, summoner spells, and skill order
ITEM BUILD
Best Wild Rift build for Ambessa Jungle, including items, runes, summoner spells, and skill order.
STARTING ITEM

Simple early attack damage, which speeds up a clear built entirely on her ability chain.
BOOTS

The omnivamp pays her back during the extended fights she wants. Ambessa still has to manage energy: attacks empowered by Drakehound's Step (Passive) restore energy, so weave one after ability casts instead of assuming an energy champion can cast without a resource limit.
CORE BUILD

Spellblade triggers between the halves of her chain, adding clear speed and the burst that makes early ganks convert.

Ability haste means more chains per camp and per gank, and Focused Will stacks through an objective fight.

The slow holds a laner still for the second half of her combo and for her team to follow up. The slow only applies below 60% target Health.
Ganks and invades leave her surrounded, and spreading that damage out gives her time to finish and get away.

Her ultimate blinks her past the frontline on purpose, so the second life makes that dive worth attempting.
SITUATIONAL ITEMS

Build this when the enemy has shields that turn her ganks into chunks instead of kills.

Build this against heavy magic burst, which is what kills her mid-chain when she dives a mage.

Replace Serylda's Grudge when Ambessa can repeatedly hit armored frontliners and enable allied physical damage. Health and haste support longer fights, while repeated physical damage reduces Armor for your whole team.

Replace Guardian Angel when Ambessa needs protection during the first dive rather than a revival afterward. Health, permanent Tenacity, and a bonus-Health Lifeline shield help you survive the return damage. Choose this or Maw of Malmortius for your Lifeline slot.

Replace Spear of Shojin when Ambessa can weave her passive attacks into several nearby champions and needs immediate recovery. The first attack against each champion delivers an empowered hit and a heal, with a separate cooldown per target.

Replace Guardian Angel against sustained magic damage that follows Ambessa through her dashes. Repeated champion magic damage stacks extra Magic Resistance and movement speed, making it a sustained-magic-damage answer.

Replace Guardian Angel when a fed crit carry is the main threat after Ambessa reaches the backline. Reduces physical critical-strike damage, so prioritize it against fed crit carries rather than purely on-hit damage.
RUNES
KEYSTONE

Her chain lands several hits on one target, so she stacks fast and the healing carries her out of the fight.
PRIMARY

Her abilities and Drakehound's Step (Passive) attacks keep damaging the same champion through a long chain, stacking Battle Zeal before the later hits land with higher amplification. The passive dashes reposition her but do not deal damage by themselves.

Her ganks land on whoever is fattest, and this is what keeps them lethal into a bruiser rather than a squishy.

Her damage comes from weaving attacks into her combo, and the attack speed adds hits to every one.
SECONDARY

Her passive dashes make it easy to trigger the bonus true damage as she starts a fight.
SITUATIONAL RUNES

Take this over Cut Down against squishy teams, since her ultimate already drags targets low.

Take this over Legend: Alacrity for longer melee fights where Ambessa can weave attacks between casts to sustain her energy. Shorter ability cooldowns give her more opportunities to shield, reposition, and repeat her damage rotation.
SUMMONER SPELLS
MAIN SPELLS
Flash
Must take. Her ganks live on angles, and Flash creates the one the enemy did not ward.
Smite
You are playing Jungle, you always take Smite. Monster damage upgrades from 600 to 1000 after 8 consumed Eco-system Protection stacks and to 1400 after 20 total.
SKILL ORDER
Skill Priority Order
- 11st Ability
 Q
- 23rd Ability
 E
- 32nd Ability
 W
Ambessa Jungle Wild Rift matchups and counters
Wild Rift matchup guide for Ambessa Jungle, covering favorable lanes and difficult counters to prepare for in ranked.
Good Matchups
These champions are favorable matchups for this pick in Wild Rift. You have advantages against them and can play more aggressively.

Nunu & Willump
Ambessa can dash around Biggest Snowball Ever! (2nd), then Public Execution (Ult) interrupts Absolute Zero (Ult) before Nunu secures the objective fight. Her chained Drakehound's Step (Passive) dashes also keep her attached after Snowball Barrage (3rd) slows the approach.

Viego
Viego needs resets in a messy brawl, but your suppression pins him before he can secure the kill that heals him, and your chained dashes out-pace his combo while his cooldowns are down.

Kayn
Kayn is a weak duelist while he farms toward his form, and your spike arrives first. Suppression into your full chain kills him before Rhaast or the Assassin ever shows up.
Ambessa Counters
These champions counter this pick in Wild Rift and can be difficult matchups. Learn how to play against them or consider banning them.

Vi
Her charged knockup and point-and-click ultimate shut down the chained mobility your kit depends on, pulling you out of a dash and holding you for her team while you have no exit left.

Rammus
Defensive Ball Curl (2nd) reflects every hit your combo lands, and his taunt holds you inside that damage with your dashes already spent. You are squishier than the tank you are attacking.
Ambessa Jungle Wild Rift game strategy and teamfighting guide
Wild Rift game strategy for Ambessa Jungle, from early lane control through mid and late game map play to final teamfights.