
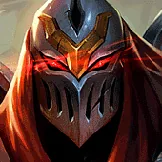
Zed Jungle Wild Rift overview and best build snapshot
Best Build
Quick snapshot of the default setup for this guide.
Items
Summoner Spells

Spell 1
Flash

Spell 2
Smite
How to play
Keep your camp clear moving Place your 2nd ability beside a camp, then aim your 1st ability so both you and your shadow throw through the monsters.
Save a shadow swap for the way out Your 2nd ability leaves a shadow; cast it again to swap positions. Keep a shadow somewhere safe instead of spending every swap to approach the enemy.
Use your ultimate on an enemy you can finish Land your damage while they are marked, then swap back before their team catches you.
Guide author
Royal
Royal has reached Rank 1 in EU and NA, and Legend and Sovereign on the Chinese server. Created by Royal with input from high elo and professional players and the WildRiftGuides Discord community.
Rank 1 on this champion? Help improve this guide and receive credit. Contact us on Discord.
Strengths
- Elite single-target burst that removes one carry from a fight before they can react.
- The shadow swap works as both engage and escape, closing the gap on a gank and pulling him back out of a dive.
- Snowballs hard, because one clean pick funds the next and a fed Zed decides where the map fights.
Weaknesses
- Squishy with no hard crowd control, so a lost early skirmish leaves him with no way to lock down the escape or peel the return damage.
- No hard crowd control and no peel, so he does little once the enemy stays behind their frontline.
- Dies to lockdown and burst, since getting caught before his swap is up means he simply dies.
Zed Jungle Wild Rift best build, items, runes, summoner spells, and skill order
ITEM BUILD
Best Wild Rift build for Zed Jungle, including items, runes, summoner spells, and skill order.
STARTING ITEM

Simple early attack damage, since his shadow rotation either kills a laner outright or achieves nothing.
BOOTS

Attack damage and armor penetration strengthen Zed's shadow rotation, while out-of-combat movement speed helps him reach lanes and find a gank angle.
CORE BUILD

Momentum builds while he paths between lanes, so the speed and penetration are active when his shadows land.

Build second after Youmuu's Ghostblade. Two separate attacks or abilities trigger max-health damage and a shield, rewarding Zed's quick shadow rotation and helping him survive the return damage before swapping out.

Build third. Repeated physical damage from Zed and his shadows stacks armor reduction, helping both Zed and his physical-damage teammates hurt the same target.

Ability haste means more shadows, which is his clear speed and how often he can gank.

The spell shield protects the angle his whole combo depends on, since one spell landing first turns an assassination into a death.
SITUATIONAL ITEMS

Replace Black Cleaver when your team has little other physical damage, or when you need more personal damage against heavily armored targets. Its percentage armor penetration supports Zed's own damage, while the slow helps keep targets below 60% Health inside his shadow rotation.

Choose Ionian Boots of Lucidity and upgrade into Crimson Lucidity instead of Armorcrusher Boots when you want more mobility at the cost of burst damage. Ability Haste brings Living Shadow (2nd) back sooner, while ability damage and summoner spell casts trigger movement speed to help Zed reposition.

Build this when shields turn Zed's gank into a survivable chunk. Shadow abilities apply the reduction before Death Mark (Ult) repeats part of the committed burst.
RUNES
KEYSTONE

His shadow rotation lands many hits on one target, so he stacks quickly and the healing carries the skirmish.
PRIMARY

Zed and his shadows land repeated ability hits in one rotation, building the rune's combat amplification before Death Mark (Ult) detonates.

His kit is built to delete squishies, and this is what keeps him useful when the target is a bruiser.

Stacking Ability Haste shortens Living Shadow (2nd) and Razor Shuriken (1st) cooldowns, giving Zed more poke rotations and another reposition before committing to the next target.
SECONDARY

Ability haste means more shadows, which is his mobility, his damage and his escape.
SITUATIONAL RUNES

Take this against squishy teams, since his rotation already leaves them in execute range.
SUMMONER SPELLS
MAIN SPELLS
Flash
Must take. His shadows are his engage and his ultimate commits him, so Flash is the only escape he keeps in reserve.
Smite
You are playing Jungle, you always take Smite. Monster damage upgrades from 600 to 1000 after 8 consumed Eco-system Protection stacks and to 1400 after 20 total.
SKILL ORDER
Skill Priority Order
- 11st Ability
 Q
- 23rd Ability
 E
- 32nd Ability
 W
Zed Jungle Wild Rift matchups and counters
Wild Rift matchup guide for Zed Jungle, covering favorable lanes and difficult counters to prepare for in ranked.
Good Matchups
These champions are favorable matchups for this pick in Wild Rift. You have advantages against them and can play more aggressively.

Morgana
Morgana's bind is her only real answer to you, and once it is down she is a slow, fragile mage with no follow-up against your shadow swap and detonation.

Viego
Viego wants a long duel he can reset from, but your burst kills him inside one rotation, before his sustain or passive heal ever matters, leaving him no corpse to take.

Talon
Talon mirrors your squishy assassin frame, but your shadow throws a second combo from a range his blink cannot answer, and your ultimate marks him for damage he cannot dash away from.
Zed Counters
These champions counter this pick in Wild Rift and can be difficult matchups. Learn how to play against them or consider banning them.

Rengar
Rengar kills you before your combo starts: he leaps from a bush with full ferocity and bursts your squishy frame before your shadow lands, so your swap never gets to save you.

Pantheon
Pantheon bullies you through your weakest window: his level-three burst arrives before yours, his Aegis (3rd) blocks your shuriken poke, and his stun-leap pins your squishy frame before you can swap out.

Vi
Vi removes the escape your whole game depends on: her ultimate is point-and-click, so the shadow swap only delays the pin, and her knockup catches you mid-combo.
Zed Jungle Wild Rift game strategy and teamfighting guide
Wild Rift game strategy for Zed Jungle, from early lane control through mid and late game map play to final teamfights.