
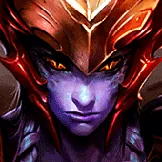
Shyvana Jungle Wild Rift overview and best build snapshot
Best Build
Quick snapshot of the default setup for this guide.
Items
Boots
Items
Summoner Spells

Spell 1
Flash

Spell 2
Smite
How to play
Keep farming to strengthen your dragon form Clear camps consistently and take safe objectives instead of chasing every early fight.
Fight when your dragon form is ready Basic attacks help fill your Fury bar, which your ultimate needs to turn you into a dragon. Wait until it is ready before starting an important fight.
Hit your fireball before attacking Hit your 3rd ability to mark the enemy, then attack them for extra damage. Use your ultimate to jump in when your team can follow.
Guide author
Royal
Royal has reached Rank 1 in EU and NA, and Legend and Sovereign on the Chinese server. Created by Royal with input from high elo and professional players and the WildRiftGuides Discord community.
Rank 1 on this champion? Help improve this guide and receive credit. Contact us on Discord.
Strengths
- One of the fastest, most sustainable clears in the role, letting her farm a level and an objective ahead.
- A real objective bully who solos dragons early and turns her passive stacks into permanent power.
- Scales into a tanky, self-healing teamfighter whose dragon form lets her outlast most late-game brawls.
Weaknesses
- No hard crowd control until her ultimate, so early ganks only work when the lane sets up the kill.
- A heads-down farmer with no dash before dragon form, making her an easy target for invades and counter-ganks.
- Her power is back-loaded, so a jungler who steals her farm and dragons can keep her from ever spiking.
Shyvana Jungle Wild Rift best build, items, runes, summoner spells, and skill order
ITEM BUILD
Best Wild Rift build for Shyvana Jungle, including items, runes, summoner spells, and skill order.
STARTING ITEM

Simple early attack damage. Her Q (1st) strikes twice, so every point of it counts double on that attack.
BOOTS

The omnivamp pays her back while she sits in a pit fight. Take these when nothing in the enemy team demands a specific boot.
CORE BUILD

Her Q (1st) empowers a basic attack, which triggers Spellblade and speeds up her clear. The move speed also helps her move between camps.

Her Q (1st) applies on-hit effects twice, so this deals its percent health damage twice in one cast. Her best item for killing tanks.
Spreads burst damage out over a few seconds instead of all at once. Build it when enemy physical burst keeps killing her right after she dives in.

Build this into repeated magic damage. The movement speed helps Shyvana stay beside targets after Dragon's Descent (Ult) lands; it does not extend the dash itself.

Build this when you are fighting in the middle of the enemy team and need both armor and magic resist. Dragon's Descent (Ult) starts a long transformed brawl, giving Shyvana reliable time to activate Twinguard.
SITUATIONAL ITEMS

Build this when Shyvana needs armor and anti-heal. Entwine applies Grievous Wounds from her own damage as well as enemy attacks, so Dragon Form's area abilities and Burnout (2nd) can spread it through the targets fighting around her.

Build this when the enemy team has multiple crit champions. Dragon's Descent (Ult) commits Shyvana into their team, so reducing crit damage helps her stay transformed and keep burning the backline.

Build this when the enemy team has several attack-speed carries. Dragon's Descent (Ult) puts Shyvana directly beside them, where Frozen Heart's aura remains active throughout her transformed attacks.

Build this when crowd control locks Shyvana down after she lands. Dragon's Descent (Ult) is already unstoppable during its dash, so save the cleanse for the disables that prevent her from attacking or staying on a target afterward.

Build this when you are diving into the whole enemy team. The shield scales with your maximum health and grows for each nearby enemy champion.

Boot swap against heavy physical damage. Dragon's Descent (Ult) puts Shyvana beside enemy carries, so armor keeps her transformed brawl alive after the initial leap.

Boot swap against heavy magic damage and crowd control. Dragon's Descent (Ult) cannot be displaced during its dash, but tenacity shortens most disables applied after Shyvana lands.

Replace Death's Dance when Shyvana needs an immediate shield after landing in dragon form and has added enough Health to support it. Health, permanent Tenacity, and a bonus-Health Lifeline shield help you survive the return damage. Choose this or Maw of Malmortius for your Lifeline slot.

Replace Blade of the Ruined King when magic damage is a bigger threat than enemy health stacking and Shyvana can keep attacking. Attack speed, Magic Resistance, Tenacity, and magic on-hit damage keep an attack-based fighter threatening against AP opponents.

Replace Death's Dance against melee teams where Shyvana can cycle attacks across champions and needs extra Health and healing. The first attack against each champion delivers an empowered hit and a heal, with a separate cooldown per target.

Replace Death's Dance when Shyvana is the main frontline and will stay beside several melee enemies after transforming. Health and mixed resistances support recurring nearby damage and healing. It pays off in extended melee fights, not when ranged enemies keep you outside its reach.
RUNES
KEYSTONE
Movement speed to keep Burnout (2nd) ticking on a target, and healing on the attacks she lands doing it.
PRIMARY

Her dragon form dash lands her in the middle of the enemy team, so she gets the bonus resists often.

Regeneration against the chip damage she takes walking into the objective fights she wants.

Dragon form puts her in the middle of the team, and the health decides how long she stays.
SECONDARY

More attack speed means more basic attacks, and each attack reduces Twin Bite's (1st) remaining cooldown so Shyvana reaches another double strike sooner.
SITUATIONAL RUNES
Take this over Fleet Footwork when fights go long and you want the healing inside them rather than before them.

Take this over Overgrowth when crowd control is a bigger threat than long-term health. Its tenacity shortens most disables and grants temporary defenses while immobilized. The shorter disable preserves Shyvana's limited dragon-form time for attacks and repeated area damage.
SUMMONER SPELLS
MAIN SPELLS
Flash
Dragon's Descent (Ult) is a committed targeted-location dash, not map-wide travel. Flash gives Shyvana a second reposition after landing or an escape while she is in Human Form.
Smite
You are playing Jungle, you always take Smite. Monster damage upgrades from 600 to 1000 after 8 consumed Eco-system Protection stacks and to 1400 after 20 total.
SITUATIONAL SPELLS

Ghost
Take this over Flash when you keep getting kited after your dragon form charge. Her damage is all sustained attacks, so staying in contact is what she needs.
SKILL ORDER
Skill Priority Order
- 13rd Ability
 E
- 22nd Ability
 W
- 31st Ability
 Q
Shyvana Jungle Wild Rift matchups and counters
Wild Rift matchup guide for Shyvana Jungle, covering favorable lanes and difficult counters to prepare for in ranked.
Good Matchups
These champions are favorable matchups for this pick in Wild Rift. You have advantages against them and can play more aggressively.

Wukong
Wukong's dash-in burst does not kill a scaled Shyvana, and once you transform your cleave and Burnout (2nd) out-damage him in the extended brawl, so his clone buys an escape rather than a kill.

Nocturne
Nocturne bets everything on one dive, and the longer the game goes the less his single combo means against your bulk, since you heal through the burst he commits.
Kha'Zix
Kha'Zix needs an isolated squishy target to delete, and a dragon-form Shyvana is neither. He can bully your early farm, but once you scale his burst bounces off your bulk.
Shyvana Counters
These champions counter this pick in Wild Rift and can be difficult matchups. Learn how to play against them or consider banning them.

Lillia
Her magic damage ignores your armor, and her ramping speed kites your dashless frame around every fight. Lillia also out-clears you, and her sleep flips any pit contest.

Nunu & Willump
Nunu contests the objective race you rely on: his Consume (1st) clear keeps pace with yours, his percent-health bite chunks the health bar you scale with, and his ultimate threatens a steal at every dragon.

Rammus
Rammus reflects the hybrid autos your damage leans on: Defensive Ball Curl (2nd) sends Twin Bite (1st) and your on-hit damage straight back, and his armor cuts your physical damage to almost nothing.
Shyvana Jungle Wild Rift game strategy and teamfighting guide
Wild Rift game strategy for Shyvana Jungle, from early lane control through mid and late game map play to final teamfights.