

Heimerdinger Mid Lane Wild Rift overview and best build snapshot
Best Build
Quick snapshot of the default setup for this guide.
Items
Items
Summoner Spells

Spell 1
Flash

Spell 2
Ignite
How to play
Fight near your turrets Place turrets with your 1st ability and fight close to them, making enemies walk into their fire instead of chasing them away.
Save your stun for an enemy approach Hit the center of your 3rd ability to stun an approaching enemy, making it easier to land your 2nd ability and turret shots.
Set up before an objective fight Place turrets with your 1st ability before enemies arrive, and fight near them with an escape route open.
Guide author
Royal
Royal has reached Rank 1 in EU and NA, and Legend and Sovereign on the Chinese server. Created by Royal with input from high elo and professional players and the WildRiftGuides Discord community.
Rank 1 on this champion? Help improve this guide and receive credit. Contact us on Discord.
Strengths
- Turret crossfire holds tight spaces: near a tower, a choke, or the Dragon pit, the enemy simply cannot stand there.
- Forgiving, low-mechanics damage, since the turrets aim themselves and the rockets fan out wide.
- Electron Storm Grenade (3rd) can arc over walls and minions, but its stun requires landing the center of the explosion; outer hits only slow.
Weaknesses
- He has no mobility, so a diver who crosses the turret zone can keep him from creating distance.
- Awful roamer, since his power sits in placed turrets and leaving lane abandons his whole kit.
- Turrets take time to charge and can be cleared or ignored, so patient enemies poke them down or path around them.
Heimerdinger Mid Lane Wild Rift best build, items, runes, summoner spells, and skill order
ITEM BUILD
Best Wild Rift build for Heimerdinger Mid Lane, including items, runes, summoner spells, and skill order.
STARTING ITEM

Early ability power, which feeds his turrets as well as his own casts.
BOOTS

Magic penetration applies to his turret damage as well as his rockets, so it does more on him than raw stats.
CORE BUILD

His turrets and rockets keep the burn applied on several enemies at once, so the stacking bonus stays near its cap.

His turrets never stop dealing damage, so the max health burn stays applied to whoever stands in his zone.

The slow keeps enemies inside turret range, which is the main problem with a setup they can walk out of.

Cuts the magic resist that lets a frontline stand in his turret fire. Choose it over Cryptbloom when enemies are stacking magic resist and maximum personal damage matters more than ability haste and team healing.

Multiplies his ability power, and his turrets scale with it, so the whole setup gets stronger.
SITUATIONAL ITEMS

Ultimate haste means more upgraded abilities, since his ultimate is what upgrades them.

The alternative to Void Staff. Less penetration, but the ability haste and healing on takedown help when he holds a fight around his turrets. Choose it when enemies have not built much magic resist, so trading Void Staff's extra damage for more ability haste and an area heal after takedowns is worthwhile.

Build this when the enemy heals through his turret damage. Buy Oblivion Orb early, since the anti-heal works from the component and the full item can wait.

Build this when shields absorb Heimerdinger's turret pressure. Repeated turret shots refresh the reduction, making defensive shields less effective throughout a fight in his setup zone.

Build this against assassins, since stasis buys time for his placed turrets to keep firing. Buy Seeker's Armguard early for the armor and ability power.

Build this when one hook or engage spell bypasses Heimerdinger's turret zone. The spell shield preserves his prepared position long enough for grenade, rockets, and turrets to punish the diver.
RUNES
KEYSTONE
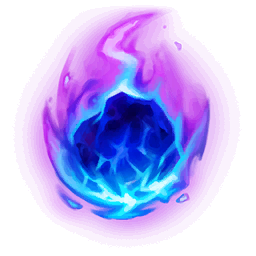
Turret shots, rockets, and the grenade give Heimerdinger repeated chances to trigger Comet, while his grenade stun and Rylai's slow make it harder to avoid.
PRIMARY

His ultimate is what upgrades his abilities, so takedowns cutting its cooldown means more upgraded casts per fight.

Ability haste means more turrets and more grenades, which is how much space he controls.

His poke is a rocket volley and back off, and Scorch adds damage to that trade.
SECONDARY

All his damage is basic abilities and the turrets they place, so the amplification builds through a long siege.
SITUATIONAL RUNES
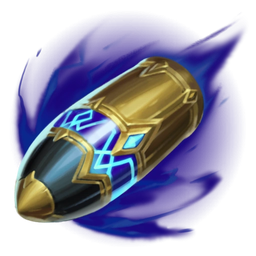
Take this instead of Arcane Comet when Heimerdinger can reliably open trades from his turret zone without being hit first, trading consistent poke damage for extra gold and burst during the opening window.

Take this over Battle Zeal against assassins who can cross his turret zone and burst him before he can reposition.

Take this over Battle Zeal for repeated poke and control around objectives. Shorter Hextech Micro-Rockets (2nd) and CH-2 Electron Storm Grenade (3rd) cooldowns let Heimerdinger contest the next approach to his turret setup.
SUMMONER SPELLS
MAIN SPELLS
Flash
Must take. He is immobile and stands next to his turrets, so Flash is the only way he leaves a gank alive.
Ignite
Take this for early kill pressure in lane and on roams, since kills are what turn a mid lead into pressure on the rest of the map. The Grievous Wounds also makes it strong into champions with a lot of healing.
SKILL ORDER
Skill Priority Order
- 11st Ability
 Q
- 22nd Ability
 W
- 33rd Ability
 E
Heimerdinger Mid Lane Wild Rift matchups and counters
Wild Rift matchup guide for Heimerdinger Mid Lane, covering favorable lanes and difficult counters to prepare for in ranked.
Good Matchups
These champions are favorable matchups for this pick in Wild Rift. You have advantages against them and can play more aggressively.

Annie
Annie has to walk into turret range to land her combo, and that step up is where the crossfire punishes her, while your grenade stun beats her to the flash all-in.
Brand
Brand has no escape and melts to sustained turret damage the moment he commits, and your grenade stun shuts down his combo before he gets a full rotation off.

Twisted Fate
Twisted Fate is squishy and immobile until his stun card is loaded, so the nest keeps him from ever stepping up to trade, and your shove pins him to his tower instead of roaming.

Ahri
Ahri can only kill you by diving straight into your crossfire, and a whiffed charm leaves her standing in the turrets with nothing, while your wave clear keeps pace with her roams.
Heimerdinger Counters
These champions counter this pick in Wild Rift and can be difficult matchups. Learn how to play against them or consider banning them.
Zed
His shadows and dashes skip your crossfire and land him on top of you, where your immobility has no answer to his burst or Death Mark (Ult) repeating part of the damage he dealt while it was active.
Kassadin
Kassadin blinks past your turrets, and his passive shrugs off your magic poke while he stacks up. After his spike he lands on you faster than you can react, and you have no answer.

Yasuo
Yasuo dashes through your minions and past the turrets, and his wind wall (2nd) blocks your rockets and grenade outright, so once he reaches you there is no kiting him off.

Irelia
Irelia dashes off your minions straight onto you, healing through the turret damage with her resets, and your immobility means you cannot peel her off once her stun lands.
Heimerdinger Mid Lane Wild Rift game strategy and teamfighting guide
Wild Rift game strategy for Heimerdinger Mid Lane, from early lane control through mid and late game map play to final teamfights.