
Kassadin Mid Lane Wild Rift overview and best build snapshot
Best Build
Quick snapshot of the default setup for this guide.
Items
Boots
Items
Summoner Spells

Spell 1
Flash

Spell 2
Ignite
How to play
Protect your early farm Before level 5, take the last hits you can reach safely. Recall if the enemy can dive you when the next wave arrives.
Trade while your shield is up When Void Stone (Passive) is ready and a mage is nearby and visible, use Nether Blade (2nd) on a minion. Take a short trade while the shield absorbs their response.
Farm across the map, then find a carry Collect safe waves when a fight is not playable, and use Riftwalk (Ult) to reach a good flank with enough mana left to escape.
Strengths
- Void Stone (Passive) gives Kassadin a temporary magic shield after casting near a visible enemy champion. With the passive ready, use Nether Blade (2nd) to last-hit a minion near the opponent, trigger the shield, and take a short trade while it lasts.
- Repeated Riftwalk (Ult) casts let him cross terrain, threaten isolated carries, and turn a safe side-lane wave into a flank opportunity.
- Mana and Ability Power scaling, First Strike gold, and Gathering Storm reward steady farming. Once his items and ultimate ranks come together, he can take over fights by eliminating exposed damage dealers.
Weaknesses
- Before level 5, short range and limited escape make early poke, physical damage, and coordinated dives especially dangerous.
- Void Stone (Passive) has a cooldown and protects only against magic damage. Losing health between shield windows also makes it harder to enter fights with Absolute Focus active.
- Each Riftwalk (Ult) stack raises the next cast's mana cost as well as its damage. Spending the entire mana bar to reach a target leaves Kassadin unable to continue or escape.
Kassadin Mid Lane Wild Rift best build, items, runes, summoner spells, and skill order
ITEM BUILD
Best Wild Rift build for Kassadin Mid Lane, including items, runes, summoner spells, and skill order.
STARTING ITEM

Start Amplifying Tome for Ability Power to improve Kassadin's early last-hitting and short trades. Buy Tear of the Goddess on an early recall; it is part of the scaling plan, not the starting purchase.
BOOTS

Prioritize Boots of Mana and an early Tear of the Goddess before finishing Malignance. Mana regeneration supports safe spell farming, and the bonus damage to minions helps Kassadin collect waves without spending every cooldown. Finish Spellslinger's Shoes later.
CORE BUILD

 Buy Tear of the Goddess before Malignance
The first completed core item in the standard build. Its mana and ultimate haste support more Riftwalk (Ult) casts, while hitting a champion with the ultimate creates a damaging zone that reduces Magic Resistance. Use this spike to punish exposed targets without abandoning farm.

Complete the early Tear of the Goddess after Malignance. Maximum mana becomes additional Ability Power, and the mana refund helps sustain repeated Riftwalk (Ult) casts. Continue stacking toward Seraph's Embrace while keeping enough mana to escape a fight.
 Transforms into Seraph's Embrace once Tear is fully stacked

Build third, after Malignance and Archangel's Staff and before Infinity Orb. Multiplying Kassadin's Ability Power strengthens the entire burst rotation and works with Absolute Focus and Gathering Storm as the game progresses.

The usual fourth core item, after Rabadon's Deathcap. Its bonus damage to low-health targets helps Kassadin finish enemy carries with Riftwalk (Ult), Null Sphere (1st), Force Pulse (3rd), and Nether Blade (2nd). Take Zhonya's Hourglass in this slot instead when surviving the return burst or incoming crowd control is essential.

The displayed final item when you need protection after taking Infinity Orb fourth. Move it into Infinity Orb's fourth slot against dangerous burst or crowd-control setups, then choose the final item for the enemy team. Activate Stasis before the lethal hit or disable lands; it buys time for Riftwalk (Ult) to become available, but you still need mana and a safe exit when it ends.
SITUATIONAL ITEMS

Build Rod of Ages as your first core item instead of Malignance when you want to prioritize late-game scaling over early damage and need extra durability against the enemy team. Its Health, Mana, and scaling Ability Power help Kassadin survive longer fights. Buy it early so it has time to stack, then continue into Archangel's Staff and Rabadon's Deathcap.

Replace the displayed final Zhonya's Hourglass when enemies stack Magic Resistance and you can survive without Stasis. If Zhonya's was already bought fourth, Void Staff can fill the last slot instead of Infinity Orb. Prioritize penetration when resistance is stopping Kassadin's burst from threatening carries.

Use the final slot against shielding that repeatedly protects enemy carries. Kassadin's ability damage applies shield reduction, helping the team break through protection that would otherwise absorb his burst. Replace the displayed Zhonya's Hourglass if Stasis is unnecessary, or take this last after buying Zhonya's fourth.

Choose for the final slot when blocking one incoming ability and gaining Magic Resistance gives Kassadin a safer entry. Keep the spell shield intact before looking for Riftwalk (Ult) flanks; poke can remove it. This is an alternative to the displayed final Zhonya's Hourglass, not permission to jump into an entire crowd-control chain.

A final-slot penetration option when ability haste and healing after a takedown matter more than Void Staff's higher penetration. Kassadin can use the heal and shorter cooldowns to continue a cleanup. Choose one penetration staff based on the enemy's Magic Resistance and your need to survive between kills.

Finish the Boots of Mana upgrade once available and the purchase will not delay a major core-item spike. The added magic penetration supports Kassadin's carry-focused burst; the early shopping priority remains Mana Boots, Tear, then Malignance.

A defensive boot alternative against physical attackers who threaten to kill Kassadin before he can cast again. Start with Plated Steelcaps if that protection is necessary in lane, then upgrade later instead of following the standard Mana Boots path.

A defensive boot alternative against heavy magic damage and reducible crowd control. Start with Mercury's Treads when surviving the lane or enemy engage matters more than Mana Boots, then upgrade later for additional protection during Kassadin's entry.
RUNES
KEYSTONE

The default keystone for accelerating Kassadin's item spikes with extra gold from successful damage windows. Approach from fog of war and strike before the enemy can poke you when the rune is ready. Do not sacrifice health or a wave just to trigger it; every Riftwalk (Ult) engage does not guarantee a proc.
PRIMARY

Prioritize the extra maximum mana over Axiom Arcanist's ultimate bonuses. Kassadin spends heavily on repeated Riftwalk (Ult) casts, so the larger pool supports longer fights and works with Archangel's Staff. Stack it through safe ability hits on champions instead of forcing bad trades.

Adds Ability Power while Kassadin stays above the rune's health threshold, strengthening the opening burst before enemies can retaliate. Preserve health during lane and approach late-game fights from an unseen angle so the bonus is available when you commit.

Scaling Ability Power rewards Kassadin for reaching later item and ultimate spikes. It combines with Rabadon's Deathcap to strengthen carry assassination as the game goes on, making safe experience and gold more valuable than a desperate early fight.
SECONDARY

The damage-focused final rune for lanes where Kassadin can farm without constant early harassment. Consider it against Swain, Aurelion Sol, Akali, or Ekko when you expect to manage their pressure safely. Riftwalk (Ult) enables its bonus true-damage proc when ready; respect the rune's cooldown instead of expecting bonus damage on every blink.
SITUATIONAL RUNES

Take this over Absolute Focus when you expect longer fights. Ability haste helps Kassadin cast Null Sphere (1st) and Force Pulse (3rd) again sooner, even after taking damage.

Take this over Manaflow Band when your planned build already gives you enough mana for repeated Riftwalk (Ult) casts. The bonus ultimate damage helps you burst a carry, and a takedown shortens the wait for your next blink.

Take this over Sudden Impact against lanes such as Ahri, Orianna, or Hwei when their short spell combinations threaten your health or set up a dive. Its brief damage-reduction window helps Kassadin survive a committed trade. Spaced-out poke can consume it before the main combo, so keep respecting the lane while it is on cooldown.

Take this over Sudden Impact when repeated, spaced-out poke is the main lane threat. Its recovery helps melee Kassadin stay healthy between waves; choose Bone Plating instead when surviving a short burst sequence is the priority.
SUMMONER SPELLS
MAIN SPELLS
Flash
Keep Flash every game. Kassadin needs an escape before level 5, and Flash remains useful later for dodging a key engage or extending a pick without spending another expensive Riftwalk (Ult).
Ignite
The default second spell for kill pressure when Kassadin finds an exposed carry. Its extra damage helps finish the burst, and Grievous Wounds limits healing during the all-in. Give it up when a defensive spell is necessary to survive the enemy composition.
SITUATIONAL SPELLS

Cleanse
Take this over Ignite when removable crowd control would prevent Kassadin from casting Riftwalk (Ult), such as roots from Nautilus or Maokai. It does not remove airborne effects or suppression, so Vi's knock-up still calls for careful positioning or well-timed Stasis. Its immunity window is brief; clear the key disable and use the opening to escape before the next control spell.

Barrier
Take this over Ignite when the opposing mid and jungler have enough early burst to dive Kassadin before he scales. Use the shield as the damaging part of the dive arrives; recalling before the wave crashes is still better than staying at lethal health just because Barrier is available.
SKILL ORDER
Skill Priority Order
- 13rd Ability
 E
- 21st Ability
 Q
- 32nd Ability
 W
Kassadin Mid Lane Wild Rift matchups and counters
Wild Rift matchup guide for Kassadin Mid Lane, covering favorable lanes and difficult counters to prepare for in ranked.
Good Matchups
These champions are favorable matchups for this pick in Wild Rift. You have advantages against them and can play more aggressively.
Veigar
Event Horizon (3rd) is a stun on its boundary rather than a slow cage. Riftwalk (Ult) can blink across the edge without walking through it, but Kassadin must still avoid appearing inside Veigar's follow-up burst.
Brand
Brand's whole game is landing his stun chain and letting the burn tick, and none of that survives your silence and magic shield. Once you can Riftwalk (Ult) onto him, he has nowhere to go.

Ziggs
Ziggs pokes Kassadin from extreme range early, so the opening is rough, but his mobility is limited to one Satchel Charge (2nd) hop. Repeated Riftwalks (Ult) can force that cooldown, cross the minefield, and remove the safety of his artillery range.
Vel'Koz
His long-range skillshots and true damage make the early lane a chore, but he cannot move, your shield absorbs his magic damage, and your silence cuts his combo short.

Vladimir
Vladimir's lane damage is magic, so Void Stone's (Passive) periodic shield can absorb part of a trade after Kassadin casts. It is temporary rather than permanent spell resistance, and Vladimir can keep sustaining between shield windows, so do not dismiss the early poke entirely.
Kassadin Counters
These champions counter this pick in Wild Rift and can be difficult matchups. Learn how to play against them or consider banning them.

Yasuo
His Wind Wall (2nd) blocks Null Sphere (1st) outright, his mobility matches your hops, and his early all-in arrives long before your scaling does, while his passive shield shrugs off the chip you land.

Yone
Yone has no Wind Wall (2nd) and cannot block Null Sphere (1st) that way. He still wins the early lane through mixed sustained damage, repeated Mortal Steel (1st) pressure, and Soul Unbound's (3rd) engage range before Kassadin has enough mana and ranks in Riftwalk (Ult) to answer.

Irelia
She dashes through the wave onto you with a stun your kit cannot reliably interrupt, and her resets turn one mistake into a snowball. Early Kassadin simply cannot duel her.
Zed
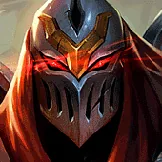
Zed's AD burst ignores your magic shield, his shadows chase your hops, and his all-in beats yours at every stage until you are full build.

Jayce
Accelerated Shock Blast (1st) deals physical damage that Void Stone's (Passive) magic shield cannot absorb, and Thundering Blow (3rd) removes Kassadin after he spends Riftwalk (Ult) to approach. Give up early priority, use Force Pulse (3rd) to secure grouped minions, and wait for repeated Riftwalk (Ult) ranks and items before contesting the lane Jayce is built to control.
Kassadin Mid Lane Wild Rift game strategy and teamfighting guide
Wild Rift game strategy for Kassadin Mid Lane, from early lane control through mid and late game map play to final teamfights.