

Morgana Mid Lane Wild Rift overview and best build snapshot
Best Build
Quick snapshot of the default setup for this guide.
Items
Items
Summoner Spells

Spell 1
Flash

Spell 2
Ignite
How to play
Farm with your pool from a safe distance Use your 2nd ability to damage minions from range, then look for a clear shot with your 1st ability to root the enemy.
Save your shield for their key control spell Use your 3rd ability before a stun or root hits you or a teammate; it cannot free someone who is already caught.
Help nearby fights after pushing After clearing the wave, join your teammates and use your 1st ability to root a target or your 3rd ability to shield an ally from crowd control.
Guide author
Royal
Royal has reached Rank 1 in EU and NA, and Legend and Sovereign on the Chinese server. Created by Royal with input from high elo and professional players and the WildRiftGuides Discord community.
Rank 1 on this champion? Help improve this guide and receive credit. Contact us on Discord.
Strengths
- Dark Binding (1st) provides long control that can set up a kill or create time to start an objective.
- Black Shield (3rd) blocks magic damage and grants crowd-control immunity only until its magic shield breaks or expires.
- Flash; Soul Shackles (Ult) can begin an area engage, but Morgana must maintain each three-second tether for the second damage and stun.
Weaknesses
- Completely immobile with no dash or blink, so every gap-closer treats her as an easy kill.
- Missing Binding (1st) removes her immediate pick, but Tormented Shadow (2nd), Black Shield (3rd), and a nearby-target Soul Shackles (Ult) still provide damage and utility.
- Black Shield (3rd) blocks magic damage and control, but physical burst still damages the protected target normally.
Morgana Mid Lane Wild Rift best build, items, runes, summoner spells, and skill order
ITEM BUILD
Best Wild Rift build for Morgana Mid Lane, including items, runes, summoner spells, and skill order.
STARTING ITEM

Early ability power for a lane built on landing a root and letting her W (2nd) do the rest.
BOOTS

Magic penetration keeps her W (2nd) relevant against a mid laner who buys early magic resist.
CORE BUILD

Her W (2nd) covers a wave and several champions at once, so the stacking bonus stays high in grouped fights.

Her W (2nd) ticks continuously, so the max health burn is permanently applied to anyone standing in it.

The slow holds a rooted target in her W (2nd) after the root ends, which is what turns her combo into a kill.

Multiplies her ability power. Her W (2nd) scales with it and her passive heals off it, so it is her damage and her lane sustain.

Cuts the magic resist that lets a rooted target survive her W (2nd). The healing on takedown also helps her team. Choose it when enemies have not built much magic resist, so trading Void Staff's extra damage for more ability haste and an area heal after takedowns is worthwhile.
SITUATIONAL ITEMS

Crits against low health targets, and her W (2nd) already scales with missing health, so both pay on the same enemies.

The raw penetration alternative to Cryptbloom. Build it when their frontline stacks magic resist. Choose it over Cryptbloom when enemies are stacking magic resist and maximum personal damage matters more than ability haste and team healing.

Build this when the enemy heals through her W (2nd). Buy Oblivion Orb early, since the anti-heal works from the component and the full item can wait.

Build this when shields absorb Morgana's gank or poke. A root into Tormented Shadow (2nd) applies and refreshes the reduction while the target remains trapped in the pool.

Build this when one spell must be blocked before Morgana can cast Black Shield (3rd) on herself or an ally. The extra shield layer protects the opening of her root and ultimate setup.

Soul Shackles (Ult) is a three-second tether rather than a channel, and it continues during stasis. Zhonya's keeps Morgana safe while she stays close enough for the second damage instance and stun. Buy Seeker's Armguard early for the armor and ability power.
RUNES
KEYSTONE

Her root holds the target in place, so Comet lands whenever she follows a binding with anything.
PRIMARY

Her W (2nd) is expensive and she wants it up constantly, so more mana is real uptime.

Ability haste means more roots and more W (2nd) casts, which is how much space she controls.

Her poke is a W (2nd) cast and back off, and Scorch adds damage to that trade.
SECONDARY

Her shield answers magic damage, so this covers the physical all-in it does nothing about.
SITUATIONAL RUNES

Take this over Bone Plating into a low-threat lane where the enemy cannot reliably punish her W (2nd) setup. It amplifies her damage instead of covering burst.

Take this over Bone Plating against teams that rely on repeated picks or extended objective fights. More frequent Dark Binding (1st) and Black Shield (3rd) casts help Morgana threaten another catch while protecting allies from the next control spell.
SUMMONER SPELLS
MAIN SPELLS
Flash
Must take. Her root travels slowly and is easy to dodge, so Flash is how she shortens the distance it has to travel.
Ignite
Take this for early kill pressure in lane and on roams, since kills are what turn a mid lead into pressure on the rest of the map. The Grievous Wounds also makes it strong into champions with a lot of healing.
SKILL ORDER
Skill Priority Order
- 12nd Ability
 W
- 21st Ability
 Q
- 33rd Ability
 E
Morgana Mid Lane Wild Rift matchups and counters
Wild Rift matchup guide for Morgana Mid Lane, covering favorable lanes and difficult counters to prepare for in ranked.
Good Matchups
These champions are favorable matchups for this pick in Wild Rift. You have advantages against them and can play more aggressively.

Annie
Black Shield (3rd) grants crowd-control immunity and absorbs magic damage only while its shield health remains. Annie's first spell may consume much of it so later stun or burst can still land; pre-shield the loaded stun and respect enough damage to break the barrier.

Lux
Black Shield (3rd) can prevent Light Binding's (1st) root while its magic shield survives Q's (1st) damage, but Lux's E (3rd) and global laser can break or exceed the remaining shield. It grants temporary immunity rather than deleting her full rotation.
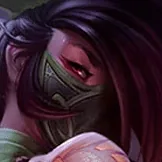
Akali
Akali's damage is mostly magic, so Black Shield (3rd) can absorb part of her committed burst, but Twilight Shroud (2nd) does not silence and Akali can wait out or break the shield before continuing. Hold Dark Binding (1st) for her reappearance.

Twisted Fate
His gold card (2nd) is magic crowd control, so Black Shield (3rd) cancels the one tool he uses to lock you down for a gank, and he has no escape from a landed bind.

Galio
Black Shield (3rd) can prevent Galio's taunt or knockup while the magic shield holds, but his magic damage can break it and leave later control active. Hero's Entrance (Ult) also lets him counter a pick by targeting an allied champion within its long but limited range.
Morgana Counters
These champions counter this pick in Wild Rift and can be difficult matchups. Learn how to play against them or consider banning them.
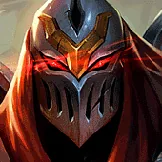
Zed
Zed's damage is physical, so Black Shield (3rd) protects nobody from him, and his shadow swaps let him sidestep the bind your whole kit leans on.

Katarina
Katarina's damage is mostly magic, so Black Shield (3rd) can absorb some burst, but neither Dark Binding's (1st) root nor Soul Shackles (Ult)' initial slow interrupts Death Lotus (Ult). The shackle stun arrives only after a three-second tether, so use stasis, leave the channel, or rely on an ally's immediate interrupt.

Fizz
Fizz becomes untargetable during Playful (3rd) and can avoid Dark Binding (1st), but his damage is primarily magic rather than physical. Black Shield (3rd) can absorb part of the combo while it holds; time Binding (1st) for his landing and do not fire it into the untargetable window.

Aurelion Sol
Aurelion Sol out-ranges your bind and out-scales you, and his sustained beam burns through Black Shield (3rd) and keeps dealing damage, so your one defensive button never answers his constant output.
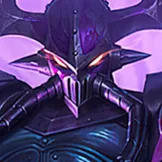
Kassadin
Kassadin has no innate permanent magic resistance. Void Stone (Passive) periodically grants a magic shield after he casts an ability, Null Sphere (1st) silences, and Riftwalk (Ult) lets him dodge Binding (1st) before it connects; pressure the shield downtime and hold Q (1st) for after the blink.
Morgana Mid Lane Wild Rift game strategy and teamfighting guide
Wild Rift game strategy for Morgana Mid Lane, from early lane control through mid and late game map play to final teamfights.