

Maokai Support Wild Rift overview and best build snapshot
Best Build
Quick snapshot of the default setup for this guide.
Boots
Items
Summoner Spells

Spell 1
Flash

Spell 2
Ignite
How to play
Use saplings to check bushes Throw your 3rd ability into a bush to leave a sapling that spots and attacks approaching enemies. Check bushes this way before walking in.
Catch enemies when your teammate can follow Use your 2nd ability to dash to and root an enemy, then your 1st ability to knock them toward your teammates.
Use your ultimate before enemies can spread Send the roots through a narrow path to start a fight or stop enemies from reaching your carry.
Guide author
Royal
Royal has reached Rank 1 in EU and NA, and Legend and Sovereign on the Chinese server. Created by Royal with input from high elo and professional players and the WildRiftGuides Discord community.
Rank 1 on this champion? Help improve this guide and receive credit. Contact us on Discord.
Strengths
- Reliable lockdown engage: his dash-root and creeping ultimate pin targets so his ADC can convert the kill.
- Hard to kill thanks to his sustain passive and natural tankiness, letting him dive first and survive.
- Strong vision and zone control with saplings that chip the enemy duo and reveal brush before flanks arrive.
Weaknesses
- His engage is a short dash, so a root that gets spell-shielded or cleansed leaves him stranded in the enemy duo with nothing to threaten.
- Cleanses, crowd-control-blocking spell shields, and disengage tools can undo or punish the root his all-in depends on; ordinary damage shields do not prevent it.
- He brings lockdown and bulk but little burst, so a Maokai who falls behind engages and then offers little else.
Maokai Support Wild Rift best build, items, runes, summoner spells, and skill order
ITEM BUILD
Best Wild Rift build for Maokai Support, including items, runes, summoner spells, and skill order.
STARTING ITEM

Turns the wave into gold and health for a support who wins lane by walking at people.
BOOTS

Armor and health, which let him survive the trade his own root starts.
CORE BUILD

The quest upgrade gives Maokai the health to survive after Twisted Advance (2nd), while his passive converts time spent tanking that engage into another heal.

Twisted Advance (2nd) roots a target to start Catcher, while Bramble Smash (1st) can maintain the control window in which allies use its Attack Speed.

Health and regeneration, so he can keep throwing saplings and soaking poke without recalling. Warmog's Heart requires 1250 bonus Health before its out-of-combat regeneration activates.

Build this when the enemy team has several attack-speed carries. Twisted Advance (2nd) roots Maokai beside the target, ensuring Frozen Heart's aura slows their follow-up attacks.

Build this when the enemy team has two or more AP champions. The move speed also helps him close before his W (2nd) is up.
SITUATIONAL ITEMS

Twisted Advance (2nd) guarantees Maokai stays beside a target long enough to trigger Heartsteel, and the permanent health also strengthens his passive healing over repeated fights.

Build this against healing. The Grievous Wounds applies from your own damage as well as when they attack you, so his roots and saplings keep it applied.

Build this when the enemy team has multiple crit champions. Twisted Advance (2nd) roots Maokai next to the carry, so reducing crit damage lets his passive healing and repeated crowd control take over.

Boot swap against heavy magic damage and crowd control, which is what peels him off the target he rooted.

The shield scales with maximum health and grows for each nearby enemy champion, covering the seconds after his W (2nd) lands him in their whole team.

Damages nearby enemies and heals him for it. He is standing surrounded after every engage.
RUNES
KEYSTONE

His Q (1st), W (2nd) and ultimate all immobilize, so the zone lands on almost every engage he starts.
PRIMARY
His root immobilizes, so the shield arrives on the same cast he engages with.

He steps up to root and takes poke for it, and this refunds enough to keep doing it.

He walks in ahead of his carry, and the extra health is what keeps him rooting through the answer.
SECONDARY

Flash into his W (2nd) is the engage everyone respects, and Hexflash keeps a version of it while Flash is down.
SITUATIONAL RUNES

Take this over Second Wind when the enemy duo answers his engage with one big all-in rather than poke.
Take this over Overgrowth when crowd control is a bigger threat than long-term health. Its tenacity shortens most disables and grants temporary defenses while immobilized. The shorter disable lets Maokai reach another passive heal or Twisted Advance (2nd) after his first engage.

Take this over Hexflash when engage frequency matters more than a surprise angle, since more roots is more chances to start a fight.

Take this over Hexflash against teams that force extended fights around narrow terrain. More frequent Bramble Smash (1st) and Twisted Advance (2nd) casts help Maokai keep divers away from his carry after his opening engage.
SUMMONER SPELLS
MAIN SPELLS
Flash
Flash closes the distance needed to target a priority champion with Twisted Advance (2nd). Once W (2nd) begins it follows that target while Maokai is untargetable, so Flash is about reaching cast range rather than speeding up the root itself.
Ignite
Take this for early kill pressure on the enemy bot lane, since kills there snowball your carry faster than anything else you can do. The Grievous Wounds also makes it strong into champions with a lot of healing.
SKILL ORDER
Skill Priority Order
- 11st Ability
 Q
- 22nd Ability
 W
- 33rd Ability
 E
Maokai Support Wild Rift matchups and counters
Wild Rift matchup guide for Maokai Support, covering favorable lanes and difficult counters to prepare for in ranked, plus the duo partners that pair best with this pick.
Good Matchups
These champions are favorable matchups for this pick in Wild Rift. You have advantages against them and can play more aggressively.

Nami
Nami has no dash, but Aqua Prison (1st) and Tidal Wave (Ult) are real knockup tools that can peel Maokai or his follow-up after he arrives. Engage from an angle that avoids the bubble, and use Bramble Smash (1st) to keep her away from the rooted carry.
Soraka
Twisted Advance (2nd) stops Soraka from walking away, but a root does not silence her: she can still cast Astral Infusion (2nd), Wish (Ult), or Equinox (3rd) while rooted. Displace her with Bramble Smash (1st) or layer allied control so she cannot freely heal through the engage.
Veigar
Veigar is immobile after Event Horizon (3rd) is spent, but untargetability does not make Twisted Advance (2nd) immune to crowd control. Bait or route around the cage before dashing, then root him once its stun is unavailable.
Pyke
Maokai is difficult for Pyke to burst, but Death From Below (Ult) still executes him whenever he falls beneath its threshold; tankiness does not create immunity. Saplings can expose approach routes, and Twisted Advance (2nd) can follow Pyke once he becomes a valid target in cast range.
Maokai Counters
These champions counter this pick in Wild Rift and can be difficult matchups. Learn how to play against them or consider banning them.
Morgana
Black Shield (3rd) can deny Twisted Advance's (2nd) root and leave you committed beside its target. Morgana cannot hit untargetable Maokai during the dash, but she can aim Dark Binding (1st) at the arrival point, so wait out the shield before committing.
Milio
His cleanse pops your root off the target the moment it lands, which deletes the whole point of your dash, and his speed-ups pull his carry out of your kill window.

Lux
Lux pokes and bursts from outside your dash range, and her binding catches you the moment you try to close, turning your engage attempt into a death sentence.
Galio
Galio's magic shield and bulk absorb sapling damage, but they do not prevent Twisted Advance's (2nd) root. The real problem is the return engage: once Maokai arrives, Galio can taunt him and protect the nearby carry.
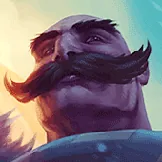
Braum
Braum can dash to the rooted carry and grant both of them resistances, then build Concussive Blows (Passive) on Maokai during the melee trade. Unbreakable (3rd) does not erase a planted sapling's area explosion, and Braum has no basic-ability flip, but Glacial Fissure (Ult) and Bramble Smash (1st) can counter-engage each other.
Synergies
The Dragon lane is a 2v2, so the carry you queue with matters as much as the matchup. These carries make the most of what this support provides.

Miss Fortune
Your root and Nature's Grasp (Ult) hold the clump that Bullet Time (Ult) erases, and saplings zone the flanks so she channels in peace.
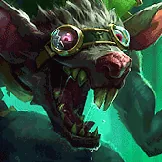
Twitch
You frontline the chaos his ambushes create: root the counter-engage, zone with saplings, and let Spray and Pray (Ult) shred through the fight you anchor.
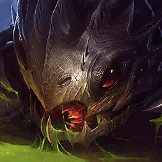
Kog'Maw
You are the tree he hides behind: roots peel divers, your ult walls off the backline, and he out-ranges everything your zone control holds at bay.
Maokai Support Wild Rift game strategy and teamfighting guide
Wild Rift game strategy for Maokai Support, from early lane control through mid and late game map play to final teamfights.