

Nami Support Wild Rift overview and best build snapshot
Best Build
Quick snapshot of the default setup for this guide.
Items
Items
Summoner Spells

Spell 1
Flash

Spell 2
Heal
How to play
Trade while healing your teammate Your 2nd ability bounces between allies and enemies, healing allies and damaging enemies. Cast it when both are close enough for the bounce to reach.
Slow enemies before aiming your bubble Use your 3rd ability to give an ally slowing attacks, or slow enemies with your ultimate. Then aim your 1st ability to trap them in a bubble.
Keep your team safe as fights start Your ultimate sends a wave that knocks up and slows enemies. Use it to stop their approach or help your team start a fight.
Guide author
Bubble
Hi, I'm Bubble, also known as "CatchThisBubble" and I am a Nami OTP on the NA server. I've consistently been able to reach sovereign and legend every season by one tricking Nami. I peaked at rank 1 on the NA server during season 14, reached rank 1 in Legendary Ranked, and I've been rank 1 Nami every season for the past couple years.
Strengths
- A landed bubble turns the lane into a kill, making her one of the most aggressive all-in enablers among enchanters.
- Her stream and heal flip between offense and peel instantly, protecting a diving carry and a fleeing one alike.
- Tidal Wave (Ult) can start or stop a fight with a 0.5-second knockup followed by a 2-to-4-second slow that scales with travel distance.
Weaknesses
- No dash and very fragile; Surging Tides (Passive) helps her reposition, but it does not save her from a clean hook or flank.
- Aqua Prison (1st) is delayed and dodgeable, so missing it removes her strongest single-target setup until its long cooldown returns.
- Mana-hungry early, so careless poke leaves her empty right when the fight she wanted arrives.
Nami Support Wild Rift best build, items, runes, summoner spells, and skill order
ITEM BUILD
Best Wild Rift build for Nami Support, including items, runes, summoner spells, and skill order.
STARTING ITEM

This item works well for Nami, as she is great at poking and harassing the enemies in lane. For harder matchups where you are forced to play much safer in lane, I recommend taking Relic Shield for the extra health and easier activation of the item.
BOOTS

Most games, you will want to rush Boots of Lucidity and upgrade them into Crimson Lucidity. This gives Nami a large power spike for the lane phase, as the cooldown reduction allows her to buff her allies and poke more, and the mana regeneration gives her great sustain in lane. It also reduces summoner spell cooldowns, which is very helpful for enchanters who need to use them to survive.
CORE BUILD

The Spectral Sickle upgrade. It gives ability power and ability haste, both of which are important stats for Nami, and her poke finishes the quest quickly.

I build Helia as my first main item after boots in most games because it fits Nami's aggressive poke playstyle in lane. Her champion damage stores Soul Fragments, which healing or shielding another ally converts into extra healing. Ebb and Flow (2nd) naturally combines both parts, and her damage in teamfights keeps Helia useful beyond lane. Harmonic Echo can take this slot instead.

I build Ardent second after Echoes of Helia in most games, before Imperial Mandate. Healing or shielding an ally grants attack speed and on-hit damage, so it is especially strong with a hypercarry ADC or several teammates who rely on basic attacks.

Build after Echoes of Helia and Ardent Censer in the default order. Aqua Prison (1st) and Tidal Wave (Ult) apply the mark, increasing damage taken by 7% for 4 seconds. The item grants conditional haste to crowd-control abilities, helping Nami set up another catch.

Staff is a great general item to have that gives ability haste and ability power to you and an ally whenever you heal / shield them. Since it synergizes so well with AP champions, consider building it earlier if you have multiple AP caster champions on your team.
SITUATIONAL ITEMS

Swap this in for Echoes of Helia when you want extra ally protection without needing to damage enemy champions first. Ebb and Flow (2nd) can spread 30% of healing or 35% of shielding to another nearby ally. If nobody else qualifies, the original target receives the extra protection.

Build this into hard matchups. Against engage tanks and hook supports you are forced to play much safer in lane, so I start Relic Shield over Spectral Sickle for the extra health and the easier activation from behind your minions.

Shurelya's is great for boosting the tempo of your team. It can be used for chasing, running away, or just in teamfights to give your team more engage and sidestepping capabilities. I like pairing this item with champions who rely on movespeed for their combat, like Jinx, Jhin, and Hecarim.

If you are against multiple champions that rely on high shielding to survive, Trident will make it easier for your team to take them down. If your teammates are getting anti-shield, you won't need to.

Against champions with high healing, buy the Oblivion Orb component early in the game, but only upgrade to Morello once you have finished all your other items.

Mikael's is crucial to buy when enemies rely on specific crowd control abilities to lockdown your team. You can also use it to cleanse your carry of a debuff or status effect. When it is needed, I will usually buy Mikael's second or third.

Veil is a super powerful item that blocks the next enemy ability outright. Nami has no dash and no escape, so buy it when the enemy has a hook or a point and click stun that would end your fight before it starts.

Locket provides a shield to all nearby allies, so it is most valuable when against high AOE damage or teamfight focused games.

When you have a single carry that you really need to protect at all costs, Knight's Vow can be bought to help funnel your carry to make them even stronger. This is even more useful against AD teams because of the armor it provides.
RUNES
KEYSTONE

Nami's best keystone is Aery. Aery provides extra poke against enemies in lane and shielding for your allies. It is very consistent and is the default keystone for Nami.
PRIMARY

Ebb and Flow (2nd) can damage an enemy and bounce into an allied heal; Font of Life adds another heal for Nami and her lowest-health nearby ally on that same trading pattern.

Bone Plating reduces the next three hits when an engage support reaches Nami, buying time to cast Ebb and Flow (2nd), land Aqua Prison (1st), and move away with her passive speed.

Revitalize amplifies Ebb and Flow's (2nd) healing and the shields Aery adds to Nami's allied casts, so both halves of her poke-and-sustain pattern scale from one rune.
SECONDARY

Ebb and Flow (2nd) is powerful but mana-hungry because Nami wants to cast it every trade. Manaflow Band increases the pool that keeps her bounce healing and poke available through lane.
SITUATIONAL RUNES

Against enemy comps with high mobility or high diving potential, Ice Overlord can get a lot of value. The AOE slow and damage reduction offers control against mobile champions and in chaotic teamfights, and makes it easier to CC chain with Nami's bubble. Take this over Aery.

Ability Haste gives Nami more Ebb and Flow (2nd) and Aqua Prison (1st) opportunities between engages. It does not shorten Redemption or Mikael's active cooldowns.

Take this over Manaflow Band when winning lane matters more than mana insurance. An enemy-targeted Ebb and Flow (2nd) triggers Scorch before bouncing back to heal Nami or her carry.

Take this over Manaflow Band in lanes where mana is manageable and repeated protection is the priority. More frequent Ebb and Flow (2nd) and Aqua Prison (1st) casts help Nami sustain another trade and interrupt the next enemy approach.
SUMMONER SPELLS
MAIN SPELLS
Flash
Must take. Nami has no dash, so Flash is her only reliable escape.
Heal
The default safe choice. Take Heal to protect Nami and her carry from burst.
SITUATIONAL SPELLS

Ignite
Take this over Heal for early kill pressure or against enemies with a lot of healing.
SKILL ORDER
Skill Priority Order
- 12nd Ability
 W
- 23rd Ability
 E
- 31st Ability
 Q
Nami Support Wild Rift matchups and counters
Wild Rift matchup guide for Nami Support, covering favorable lanes and difficult counters to prepare for in ranked, plus the duo partners that pair best with this pick.
Good Matchups
These champions are favorable matchups for this pick in Wild Rift. You have advantages against them and can play more aggressively.

Yuumi
Nami can pressure Yuumi's host with repeated Ebb and Flow (2nd) trades before Yuumi's sustain scales. Track Yuumi's Final Chapter (Ult), then use Tidal Wave (Ult) from range to force the host to retreat or carry an attached Yuumi into your follow-up.
Morgana
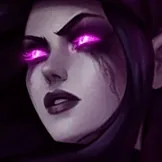
Nami can trade around Dark Binding (1st) with Ebb and Flow (2nd), but Black Shield (3rd) can deny Aqua Prison's (1st) suspension or Tidal Wave's (Ult) knockup while its magic shield holds. Draw the shield with poke or threaten a second target instead of committing both control spells into it.

Soraka
Nami out-bullies the heal war. Chunk her early, bring Ignite to cut her sustain, and remember she is immobile, so your level-5 ultimate engage is a clean kill.

Lux
A squishy, immobile mage. Dodge her skillshots, heal the poke, and lock her down with the bubble at level 5 for an easy kill.
Nami Counters
These champions counter this pick in Wild Rift and can be difficult matchups. Learn how to play against them or consider banning them.

Blitzcrank
Rocket Grab (1st) bypasses Nami's Ebb and Flow (2nd) sustain by pulling her into Power Fist (3rd) burst before another heal can land. Keep a minion between you and the hook, ward the lane brush instead of facechecking it, and hold Aqua Prison (1st) for Blitzcrank's landing point or Overdrive (2nd) run rather than spending it on routine poke.
Nautilus
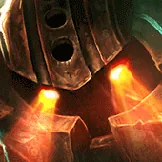
An engage tank whose hook chain starts fights on his terms, and one catch on a squishy Nami can kill you. Play safe behind minions and save the bubble to peel.

Leona
Zenith Blade (3rd) lets Leona cross the poke lane and root the furthest champion it hits, then Shield of Daybreak (1st) supplies the follow-up stun. Respect her level-2 spike, stand away from your carry so she cannot threaten both, and suspend her after she commits.

Thresh
Hook, flay (3rd), and lantern all fight Nami's game plan. Take Relic Shield, ward the lane bushes, and save your bubble to peel a hooked ADC.

Pyke
A hook assassin who deletes squishy supports from the fog. Stay behind minions, ward aggressively, and keep the bubble for peel.

Sona
At three basic-ability casts, Sona can hold an empowered attack that stuns for 0.5 seconds, so respect it before walking up to trade. Her Crescendo (Ult) can also counter-engage through your team; pressure her weaker early durability without standing together for its line.
Synergies
The Dragon lane is a 2v2, so the carry you queue with matters as much as the matchup. These carries make the most of what this support provides.

Lucian
The signature duo: Nami's heal or Aqua Prison (1st) suspension grants Lucian Vigilance damage, while Tidecaller's Blessing (3rd) is applied by the on-hit effects of his Lightslinger (Passive) shots. Cast the buff before his ability-and-double-shot weave to front-load an exceptionally strong short trade.

Ezreal
He has no crowd control of his own, so Aqua Prison (1st) supplies it: a suspended target is a free Mystic Shot (1st), and each Mystic Shot (1st) hit reduces his other cooldowns. Tidecaller's Blessing (3rd) works on both his basic attacks and Mystic Shot's (1st) on-hit application, adding a slow that helps the next skillshot land.
Corki
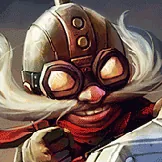
Tidecaller's Blessing (3rd) adds magic damage and a slow to Corki's attacks while Aqua Prison (1st) holds a target for Phosphorus Bomb (1st), Gatling Gun (3rd), and Missile Barrage (Ult). When his passive package grants four Big Ones (Ult), Tidal Wave (Ult) can keep enemies in the missile corridor long enough for him to spend them.
Nami Support Wild Rift game strategy and teamfighting guide
Wild Rift game strategy for Nami Support, from early lane control through mid and late game map play to final teamfights.