

Thresh Support Wild Rift overview and best build snapshot
Best Build
Quick snapshot of the default setup for this guide.
Items
Boots
Items
Summoner Spells

Spell 1
Flash

Spell 2
Ignite
How to play
Look for hooks from a clear angle Your 1st ability hooks the first enemy it hits. Use bushes and move around minions before aiming at a champion.
Keep your lantern ready for an ally Throw your 2nd ability toward a teammate in danger while you stand somewhere safe. They can use the lantern to dash to you.
Do not follow every hook Recast your 1st ability to follow a hooked enemy only when your team can help. Save your 3rd ability to push enemies away from your damage dealer.
Guide author
Royal
Royal has reached Rank 1 in EU and NA, and Legend and Sovereign on the Chinese server. Created by Royal with input from high elo and professional players and the WildRiftGuides Discord community.
Rank 1 on this champion? Help improve this guide and receive credit. Contact us on Discord.
Strengths
- Hook plus lantern give him both the engage and the rescue, starting fights and saving his carry from the same kit.
- Flay (3rd) and The Box (Ult) make him a top peeler, walling off divers and dragging threats off his marksman.
- Stacking souls turn him into a roaming, scaling bruiser-support with real weight in skirmishes, not just utility.
Weaknesses
- Everything runs through one skillshot: a missed Death Sentence (1st) leaves him with nothing to threaten until it returns.
- His combo demands execution under pressure, and a fumbled hook-flay (3rd)-lantern sequence wastes the whole window.
- Disengage and a well-timed Black Shield (3rd) can undo even a landed hook before his duo converts it.
Thresh Support Wild Rift best build, items, runes, summoner spells, and skill order
ITEM BUILD
Best Wild Rift build for Thresh Support, including items, runes, summoner spells, and skill order.
STARTING ITEM

Turns the wave into gold and health for a support whose passive already rewards him for collecting souls.
BOOTS

Armor and health on top of the armor his souls are already stacking.
CORE BUILD

Quest income. His gold and souls both convert into staying alive next to his carry.

Health and regeneration, so a missed hook no longer costs him the lane. Warmog's Heart requires 1250 bonus Health before its out-of-combat regeneration activates.

Its Spellblade triggers on the attack after his E (3rd), and the icy zone stacks with his box to make leaving almost impossible.

Build this into repeated magic damage. The movement speed helps Thresh find Flay (3rd) and hook angles, while the magic resistance keeps him alive long enough to shield himself with Dark Passage (2nd) or throw the lantern to an ally who needs an escape.

Both resists at once, and the Endurance stacks build up while he stands in the fight his hook committed him to.
SITUATIONAL ITEMS

Death Sentence (1st) or Flay (3rd) triggers Catcher so Thresh's nearby carry can attack through the catch.

Build this when Thresh needs armor and anti-heal. Entwine applies Grievous Wounds from his own damage as well as enemy attacks, so Death Sentence (1st), Flay (3rd), and The Box (Ult) can apply it to the targets he locks down.

Build this when the enemy team has a lot of attack speed dependent champions, which his box is already holding in place.

Build this when the enemy team has multiple crit champions. After a hook or Flay (3rd), Thresh stands close enough for the marksman to focus him, and crit reduction buys time to finish the lockdown or walk back toward the ally using his lantern.

Boot swap against heavy magic damage and crowd control, which lands before his hook does.

The shield scales with maximum health and grows for each nearby enemy champion, covering the seconds after he hooks himself into the enemy team.

Momentum builds while he walks toward a hook angle and triggers on the E (3rd) that starts the fight.
RUNES
KEYSTONE

Death Sentence (1st) stuns and Flay (3rd) displaces, so either can trigger the zone on an engage. The Box (Ult) applies a 99% slow rather than an immobilize and should not be counted as the trigger by itself.
PRIMARY

His hook and E (3rd) can hit enemy champions, healing him and the lowest-Health allied champion nearby when the rune is ready.

He stands at hook range with no escape once his lantern is spent, and this covers the engage aimed at him.

Take this against teams whose crowd control prevents the champion's key follow-up. Its tenacity shortens most disables and grants temporary defenses while immobilized. The shorter disable lets Thresh cast Flay (3rd) or lantern after a hook instead of being stopped beside the target he caught.
SECONDARY

Flash into hook is his engage, and Hexflash keeps a version of it while Flash is down.
SITUATIONAL RUNES

Take this over Hexflash when hook and lantern uptime matter more than a second gap closer.

Take this over Hexflash when repeated peel matters more than a surprise Flash engage. Shorter Death Sentence (1st), Dark Passage (2nd), and Flay (3rd) cooldowns help Thresh answer another diver and protect a teammate again.
SUMMONER SPELLS
MAIN SPELLS
Flash
Must take. Flash into his hook is how he lands it on someone who has been standing outside its range all lane.
Ignite
Take this for early kill pressure on the enemy bot lane, since kills there snowball your carry faster than anything else you can do. The Grievous Wounds also makes it strong into champions with a lot of healing.
SITUATIONAL SPELLS

Heal
Take this over Ignite when your carry keeps dying to the dive. His lantern brings them back but it does not restore the health they already lost.
SKILL ORDER
Skill Priority Order
- 13rd Ability
 E
- 21st Ability
 Q
- 32nd Ability
 W
Thresh Support Wild Rift matchups and counters
Wild Rift matchup guide for Thresh Support, covering favorable lanes and difficult counters to prepare for in ranked, plus the duo partners that pair best with this pick.
Good Matchups
These champions are favorable matchups for this pick in Wild Rift. You have advantages against them and can play more aggressively.

Soraka
She heals everything except being pulled out of position, and a landed hook drags the team's whole sustain source into your duo before she can cast anything.

Sona
Immobile, extremely squishy, and reliant on standing in the perfect spot for her auras, which is exactly the spot your hook punishes, with no hard crowd control before her ultimate to stop you.
Nautilus
You win the hook mirror on utility: his approach is slow and telegraphed, your Flay (3rd) interrupts his combo, and your lantern undoes whatever he hooks while he has no rescue of his own.
Blitzcrank
Death Sentence (1st) gives Thresh a competing hook, Flay (3rd) can interrupt Blitzcrank's Overdrive (2nd) approach, and Dark Passage (2nd) extracts the ally Rocket Grab (1st) catches. Stand near enough to lantern the target but do not body the grab accidentally, then punish Blitzcrank during its cooldown with the Flay (3rd) into hook sequence.

Lulu
Her whole defense is one Whimsy (2nd) while your kit brings three separate threats, so the hook, flay (3rd), and box each demand an answer and polymorph cancels only one.
Thresh Counters
These champions counter this pick in Wild Rift and can be difficult matchups. Learn how to play against them or consider banning them.
Morgana
Black Shield's (3rd) crowd-control immunity prevents Death Sentence's (1st) stun and tugs while the shield holds; do not recast expecting to dash to a successfully shielded target. Break or bait the shield first, while respecting Dark Binding's (1st) range during the hook wind-up.

Braum
Unbreakable (3rd) can intercept Death Sentence (1st) and make Braum the hooked target instead of the carry behind him. Do not take the recast into his frontline unless the angle is intentional, and use Flay (3rd) to keep Braum from stacking Concussive Blows (Passive) on your carry.

Galio
Pulling him drags a taunt into your own backline, his magic resist blunts your chip damage, and his counter-engage taunt flips every pick you start into a fight his team wanted.
Synergies
The Dragon lane is a 2v2, so the carry you queue with matters as much as the matchup. These carries make the most of what this support provides.
Draven
The classic aggressive pairing: hook and Flay (3rd) hold targets in axe range, and the lantern forgives every coinflip his catch game demands.
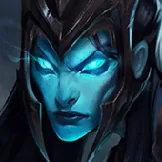
Kalista
Fate's Call (Ult) is built around a support like you: hook the pick, take the toss, and lantern her out when the hop pattern runs dry.

Jinx
Your kit is a full peel package for her hyper-carry game: lantern the dive away, Flay (3rd) the assassin, box the collapse, and let the rockets work.
Thresh Support Wild Rift game strategy and teamfighting guide
Wild Rift game strategy for Thresh Support, from early lane control through mid and late game map play to final teamfights.