
Braum Support Wild Rift overview and best build snapshot
Best Build
Quick snapshot of the default setup for this guide.
Items
Boots
Items
Summoner Spells

Spell 1
Flash

Spell 2
Heal
How to play
Help your teammate trigger your stun Hit an enemy with your 1st ability or a basic attack to start your passive mark. Four total hits from you and your allies trigger the stun.
Face your shield toward the threat Use your 3rd ability to raise your shield toward incoming projectiles while standing between them and your damage dealer.
Keep enemies off your carry Use your 2nd ability to jump to an ally, then your 3rd ability to block incoming projectiles or your ultimate to knock up their attacker.
Guide author
Royal
Royal has reached Rank 1 in EU and NA, and Legend and Sovereign on the Chinese server. Created by Royal with input from high elo and professional players and the WildRiftGuides Discord community.
Rank 1 on this champion? Help improve this guide and receive credit. Contact us on Discord.
Strengths
- Unbreakable (3rd) intercepts projectiles from the direction it faces and completely blocks the first champion damage that reaches Braum from that side.
- Elite peel: he dashes to his ADC, grants both of them resistances, soaks dives, and leaves a long slowing fissure with his ultimate.
- His slowing poke and stacking stun turn any extended trade into lockdown his carry can finish.
Weaknesses
- Short effective range, so a poke duo that fights from outside his reach chips him and his carry down freely.
- His stun needs setup: the marks must stack first, so the lockdown vanishes if his poke and his carry's autos cannot connect.
- Modest sustain early, and disengage or kiting can blunt his engage, leaving a tanky body with nothing to lock onto.
Braum Support Wild Rift best build, items, runes, summoner spells, and skill order
ITEM BUILD
Best Wild Rift build for Braum Support, including items, runes, summoner spells, and skill order.
STARTING ITEM

Turns the wave into gold and health for a support whose job is standing in front of his carry.
BOOTS

Armor and health for a champion whose whole plan is being the thing the enemy has to shoot through.
CORE BUILD

Quest income. His gold turns directly into how long his carry survives.

His shield only covers one direction, so build this when damage is coming from everywhere at once.

His W (2nd) dashes him to one ally, so pick that same carry and he takes their damage while healing off their output.

Build this when the enemy team has a lot of attack speed dependent champions. It stacks with his shield, which already blocks the first hit from that direction.

Build this when the enemy team has two or more AP champions. The move speed also helps him reach an ally in time.
SITUATIONAL ITEMS

Build this against healing. The Grievous Wounds applies from your own damage as well as when they attack you, and the armor is a bonus against a team that has to shoot through him anyway.

Build this when the enemy team has multiple crit champions. He is standing directly in front of their marksman by design.

Boot swap against heavy magic damage and crowd control. Tenacity helps Braum resume guarding his carry, while magic resistance covers the spells Unbreakable (3rd) cannot fully prevent.

Build this when you keep needing to help a fight you cannot physically reach.

Health and regeneration so he can keep soaking poke through his shield without recalling. Warmog's Heart requires 1250 bonus Health before its out-of-combat regeneration activates.
RUNES
KEYSTONE
He is already standing next to the ally he protects, which is exactly what this keystone needs.
PRIMARY

Winter's Bite (1st) can trigger Font of Life from range, healing Braum and his lowest-health nearby ally while also starting the Concussive Blows (Passive) stack his lane wants to follow.

He puts his shield between his carry and the poke, and this covers the damage that goes around it.
Take this against teams whose crowd control prevents the champion's key follow-up. Its tenacity shortens most disables and grants temporary defenses while immobilized. The shorter disable helps Braum return to his carry and raise Unbreakable (3rd) before the next projectile arrives.
SECONDARY

Ability Haste helps Braum bring Unbreakable (3rd) and Stand Behind Me (2nd) back for another peel sequence. Take it for spell uptime, not shorter Locket or Redemption cooldowns.
SITUATIONAL RUNES

Take this over Second Wind when the enemy duo commits one big all-in, since his shield already handles steady chip.

Take this over Transcendence against teams with repeated projectile pressure and multiple divers. More frequent Unbreakable (3rd) and Stand Behind Me (2nd) casts help Braum protect his carry throughout an extended fight.
SUMMONER SPELLS
MAIN SPELLS
Flash
Must take. Flash into his knock up is how he starts a fight, and his shield does the rest.
Heal
His shield blocks damage aimed at his carry, and this repairs the damage that got through. The move speed on both of them also breaks a collapse.
SKILL ORDER
Skill Priority Order
- 11st Ability
 Q
- 23rd Ability
 E
- 32nd Ability
 W
Braum Support Wild Rift matchups and counters
Wild Rift matchup guide for Braum Support, covering favorable lanes and difficult counters to prepare for in ranked, plus the duo partners that pair best with this pick.
Good Matchups
These champions are favorable matchups for this pick in Wild Rift. You have advantages against them and can play more aggressively.
Blitzcrank
His entire lane is one grab, and your shield blocks it, leaving a slow melee body with no lane control while the hook sits on cooldown.
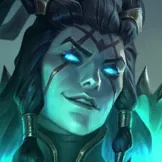
Thresh
Your shield eats Death Sentence (1st), and once the hook is denied the rest of his kit has little threat, since his pairing needs a caught target to all-in and you refuse to be caught.
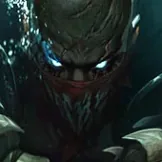
Pyke
A squishy melee engage who needs his hook and his all-in to function, and you out-tank both, so nobody on your side ever ends up isolated enough for him to reset on.
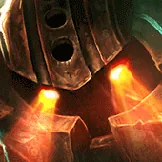
Nautilus
His hook is a projectile your shield denies, and his engage walks straight into the frontline brawl you want, so denying one throw removes his pairing's whole opener.
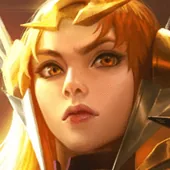
Leona
She has to walk into you to start anything, which is the brawl you were built for: her engage lands on your shield and your peel instead of your ADC.
Braum Counters
These champions counter this pick in Wild Rift and can be difficult matchups. Learn how to play against them or consider banning them.

Zyra
Her plants and skillshots fill the lane with more damage sources than one projectile block can answer, and she zones you off the wave from a range you cannot reach.
Karma
Karma pokes harder than you and shields her carry through your slow, blunting both halves of your kit, while her empowered bolt chunks you before you reach mark range.
Janna
Howling Gale (1st) interrupts Braum's walk-up before Concussive Blows (Passive) can stack, and Monsoon (Ult) pushes him away from the carry after he commits with Stand Behind Me (2nd). Preserve Unbreakable (3rd) for her allies' projectile follow-up, but stop forcing the 2v2 while Monsoon (Ult) is ready because Janna's disengage resets all four passive stacks.
Lulu
Polymorph shuts off the engage your kit lives on, her pix poke chips you all lane, her shields blunt the stun trades your passive builds toward, and Wild Growth (Ult) knocks your engage away right as it lands.
Synergies
The Dragon lane is a 2v2, so the carry you queue with matters as much as the matchup. These carries make the most of what this support provides.
Lucian
His double-shot passive stacks Concussive Blows (Passive) faster than any carry in the game: every short trade ends in your stun. The lane bullies from level one.

Jinx
You are the wall her hyper-carry dream needs: Unbreakable (3rd) eats the dive burst, your stun peels, and a protected Jinx with resets ends games on her own.
Kog'Maw
Classic bodyguard duty for the biggest late-game payoff: slow and stun everything that approaches, raise the shield, and let the artillery behind you erase the map.
Braum Support Wild Rift game strategy and teamfighting guide
Wild Rift game strategy for Braum Support, from early lane control through mid and late game map play to final teamfights.